Machine Setup Wizard
A new or freshly flashed grblHAL controller needs a handful of settings before it can be trusted to move. The Machine Setup Wizard walks through them in about five minutes and checks each one live on the machine: connection, travel, limit switches and probe, homing and safety limits.
When it runs
- First launch. The wizard opens on its own the first time ncSender starts.
- Any time later. Open Settings → General and click Run setup wizard in the Machine Setup Wizard card at the top of the page.
Machine already set up and working?
Click Skip for now on the welcome page. The wizard is meant for a new controller; re-applying settings to a working machine is not needed. Skipping marks the wizard as done, so it will not open again on the next launch. Closing it from a later step does not, and it will come back, unless you already applied settings.
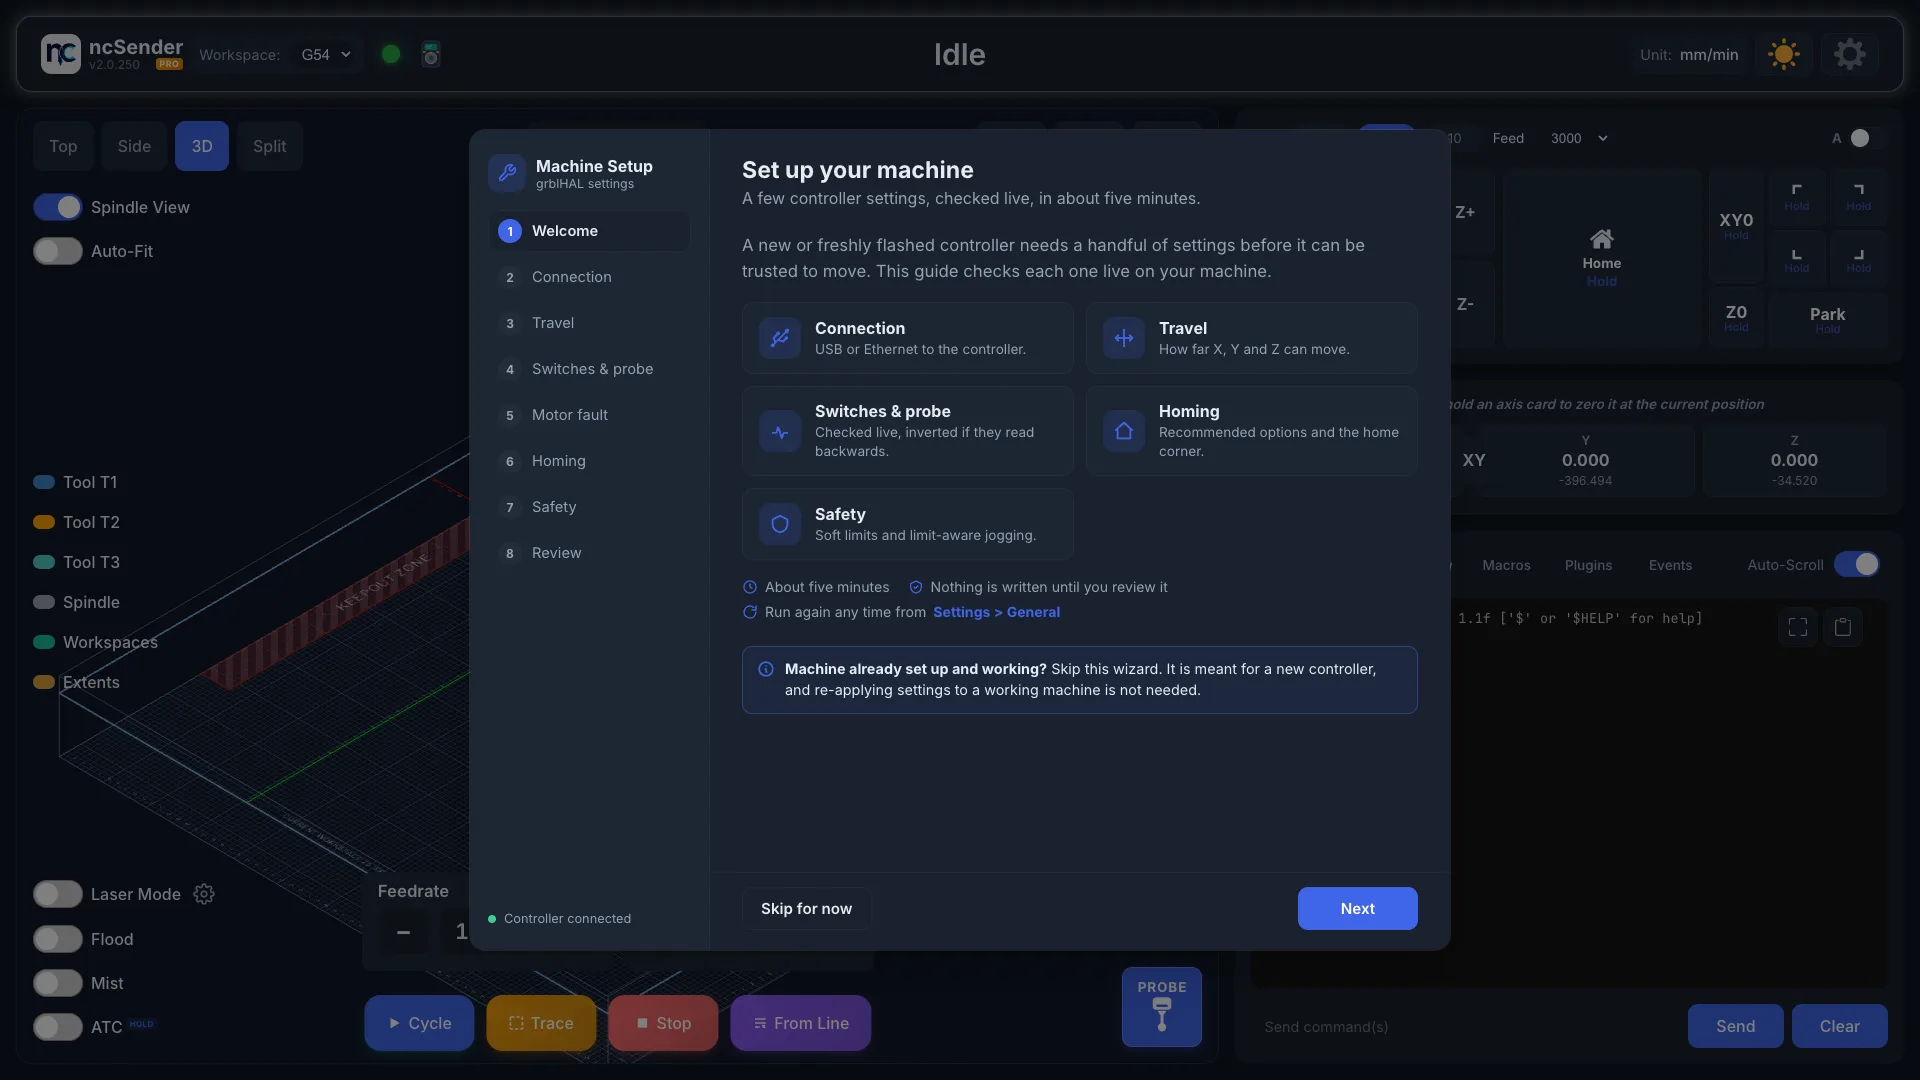
Walking through it
Completed steps get a check mark. Click one to go back to it. The wizard also shows whether the controller is connected.
Nothing is written to the controller until the Review step, with two exceptions called out below: switch inversion and motor fault inputs are sent immediately, because you need to see the result while you press the switch.
Connection
Pick USB or Ethernet.
| Connection | Fields |
|---|---|
| USB | Serial port (Auto-detect or a specific port, with Rescan) and baud rate. grblHAL boards use 115200. |
| Ethernet | IP address, port and protocol (Telnet on port 23 or WebSocket on port 81). |
Click Save & connect. ncSender connects on its own and shows the live result. Next stays disabled until the controller answers.
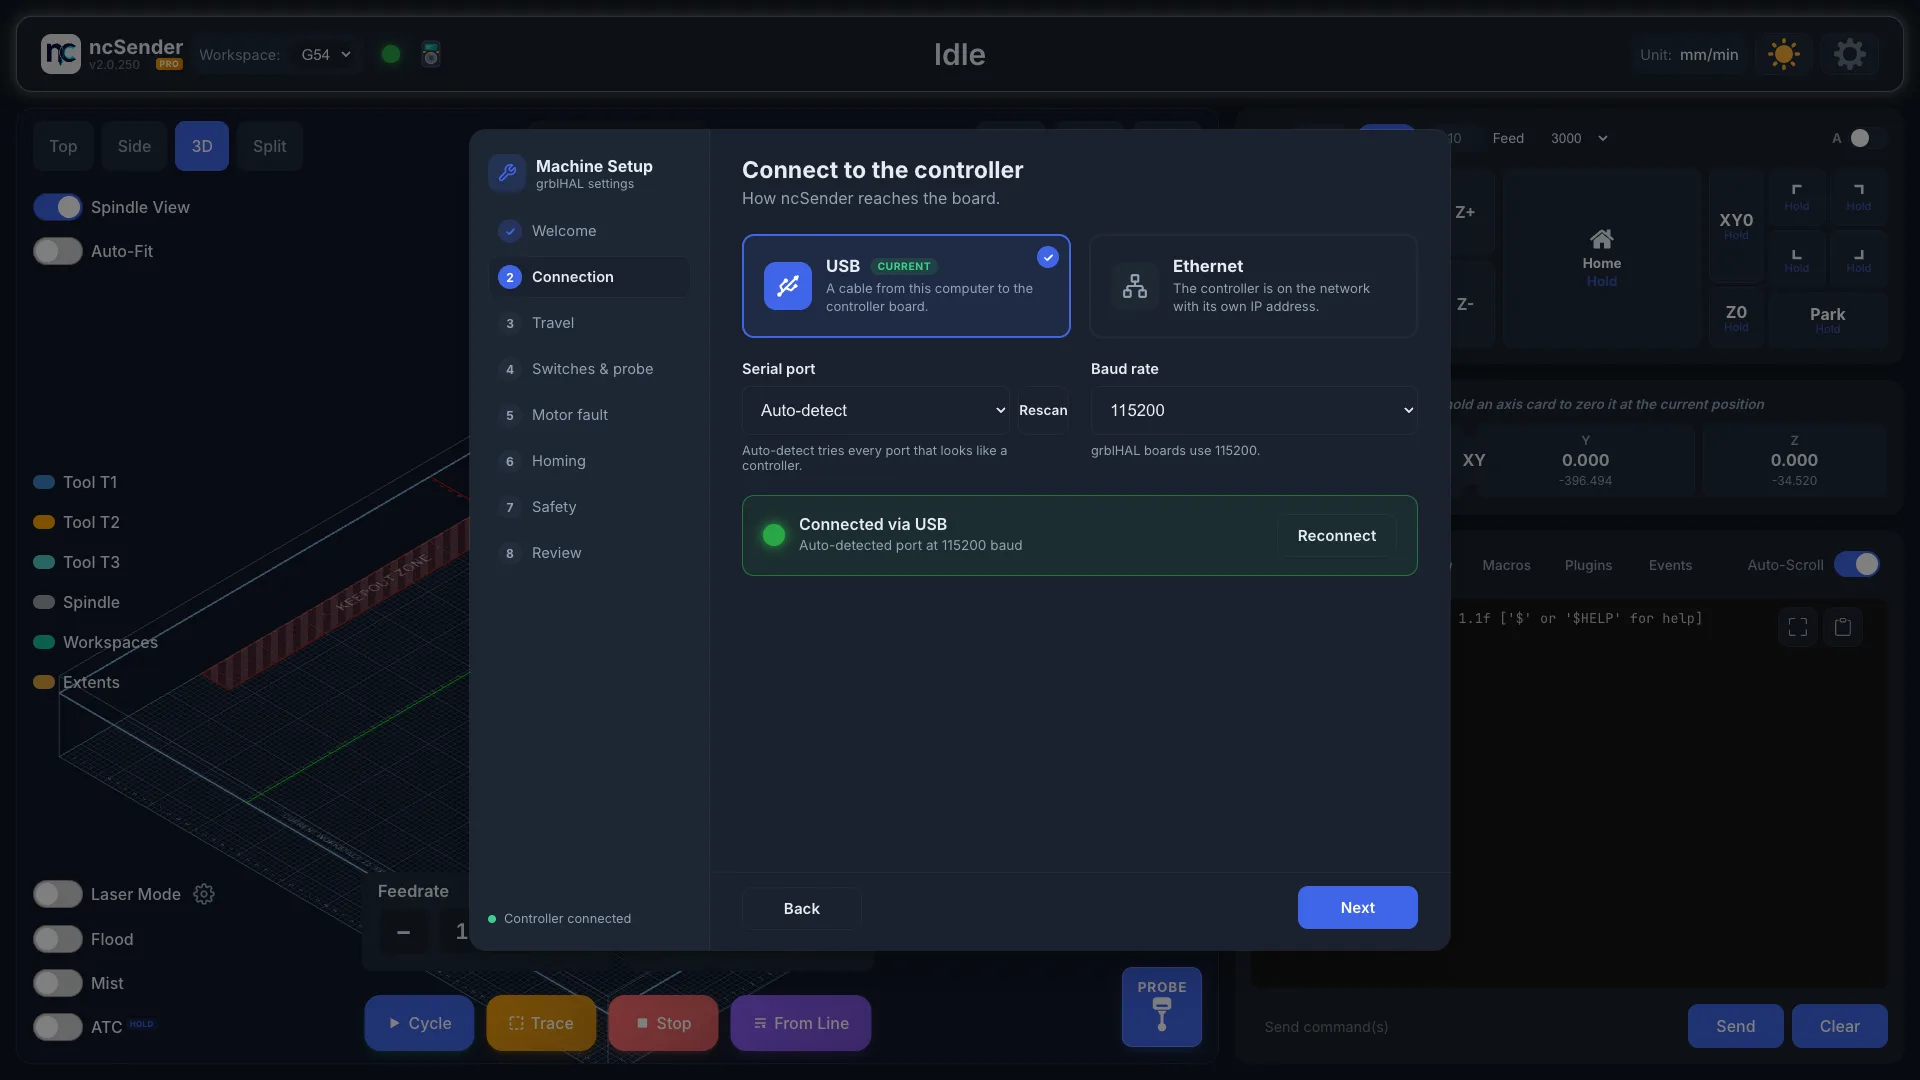
This is the same connection setup found under Settings → General, so you can change it later without running the wizard again. See First Connection.
Travel
Enter how far each axis can move from one end to the other. These become
$130, $131 and $132 (max travel), which soft limits and the work area in
the visualizer are built on. Each row shows the value the controller has now.
Fields follow your unit preference and convert to millimetres for you.
Switches & probe
Press each limit switch by hand and watch its light. The colours match the pin states in the toolbar: green while released, red while pressed. If a row shows the other way round, turn on Invert for it.
The Probe row works the same way; a Toolsetter row appears when the controller reports a second probe input.
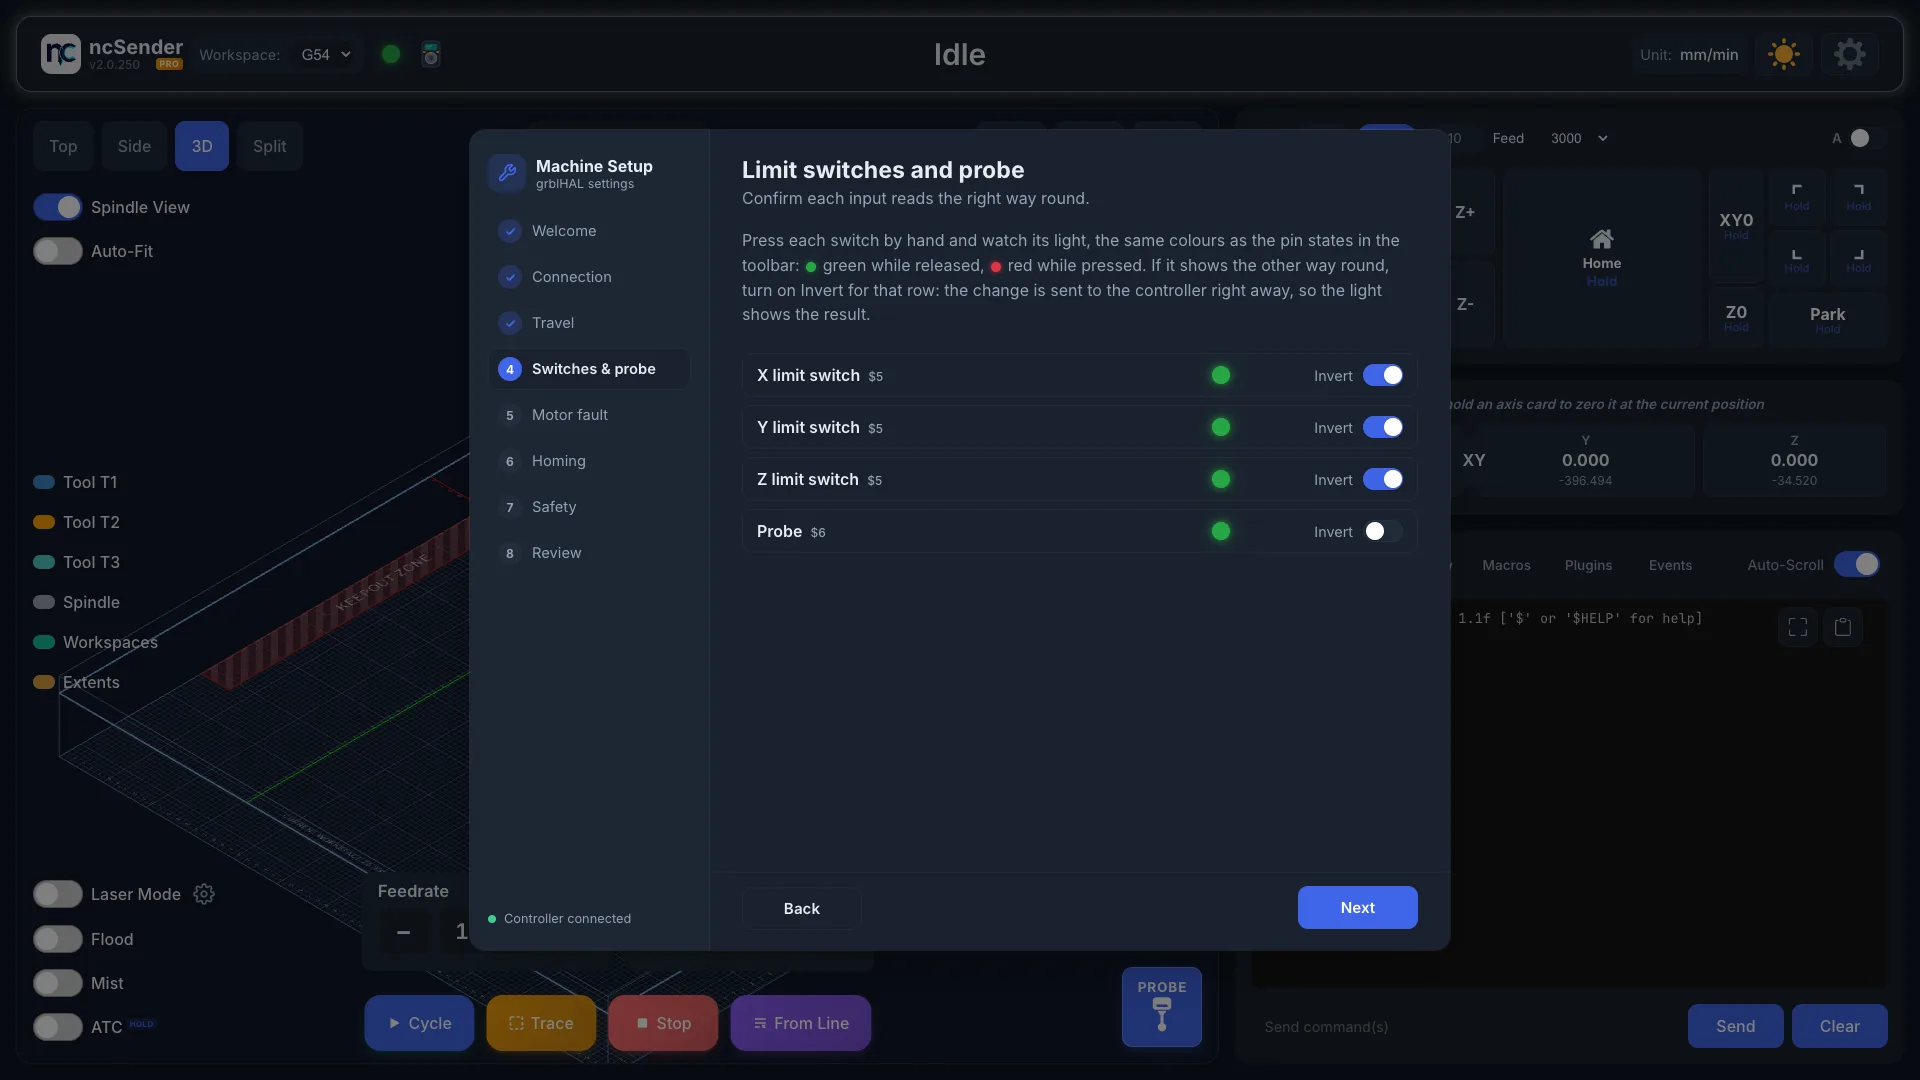
Applied immediately
Invert is written to the controller the moment you toggle it ($5 for
limit switches, $6 for probes), so the light shows the real result. An
inversion that reads backwards can trip an alarm. If a red Controller
alarm bar appears on this page, flip the inversion back, then press
Unlock on the bar.
Motor fault
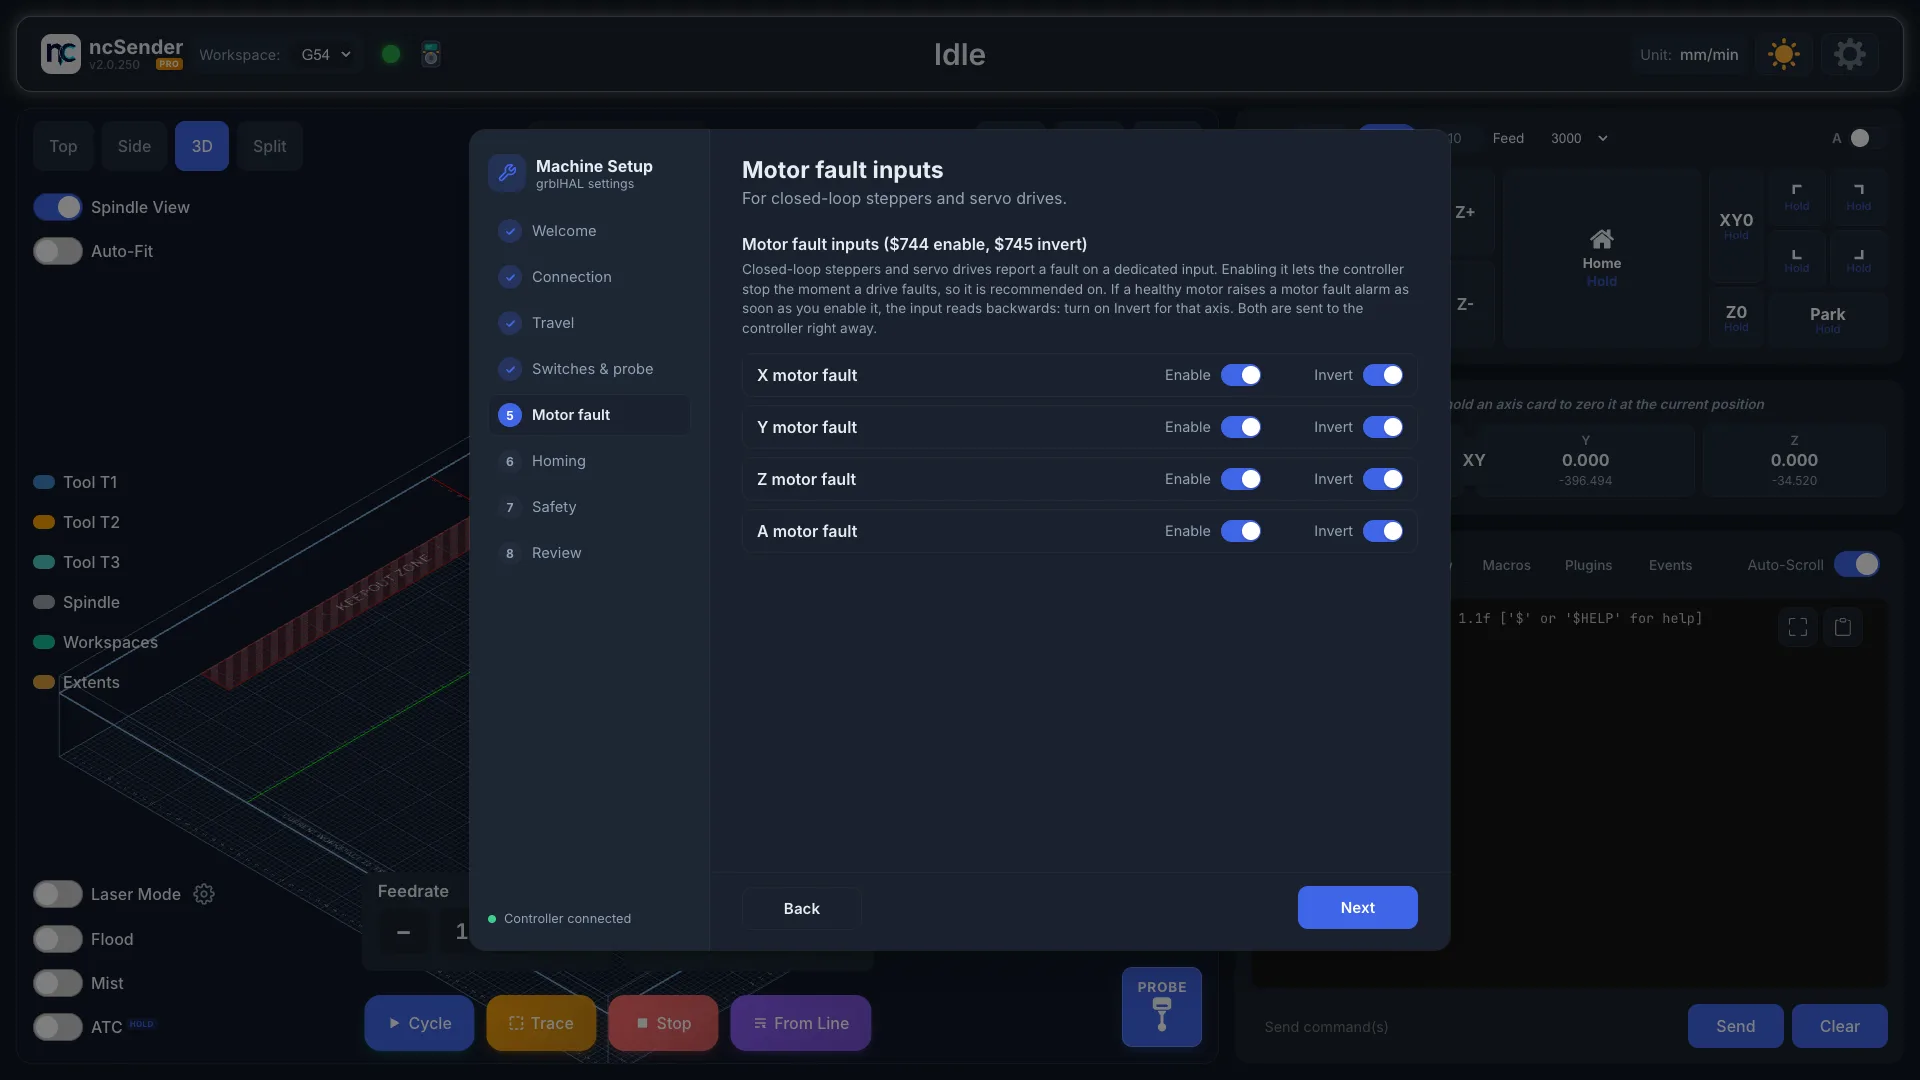
This step only appears when the board reports $744, which closed-loop
stepper and servo controllers use for a dedicated fault input.
Each axis has an Enable and an Invert toggle, written to $744 and
$745 right away. Enabling the input is recommended: it lets the controller
stop the moment a drive faults. If a healthy motor raises a motor fault alarm
as soon as you enable it, the input reads backwards. Turn on Invert for
that axis, then press Unlock on the alarm bar.
Homing
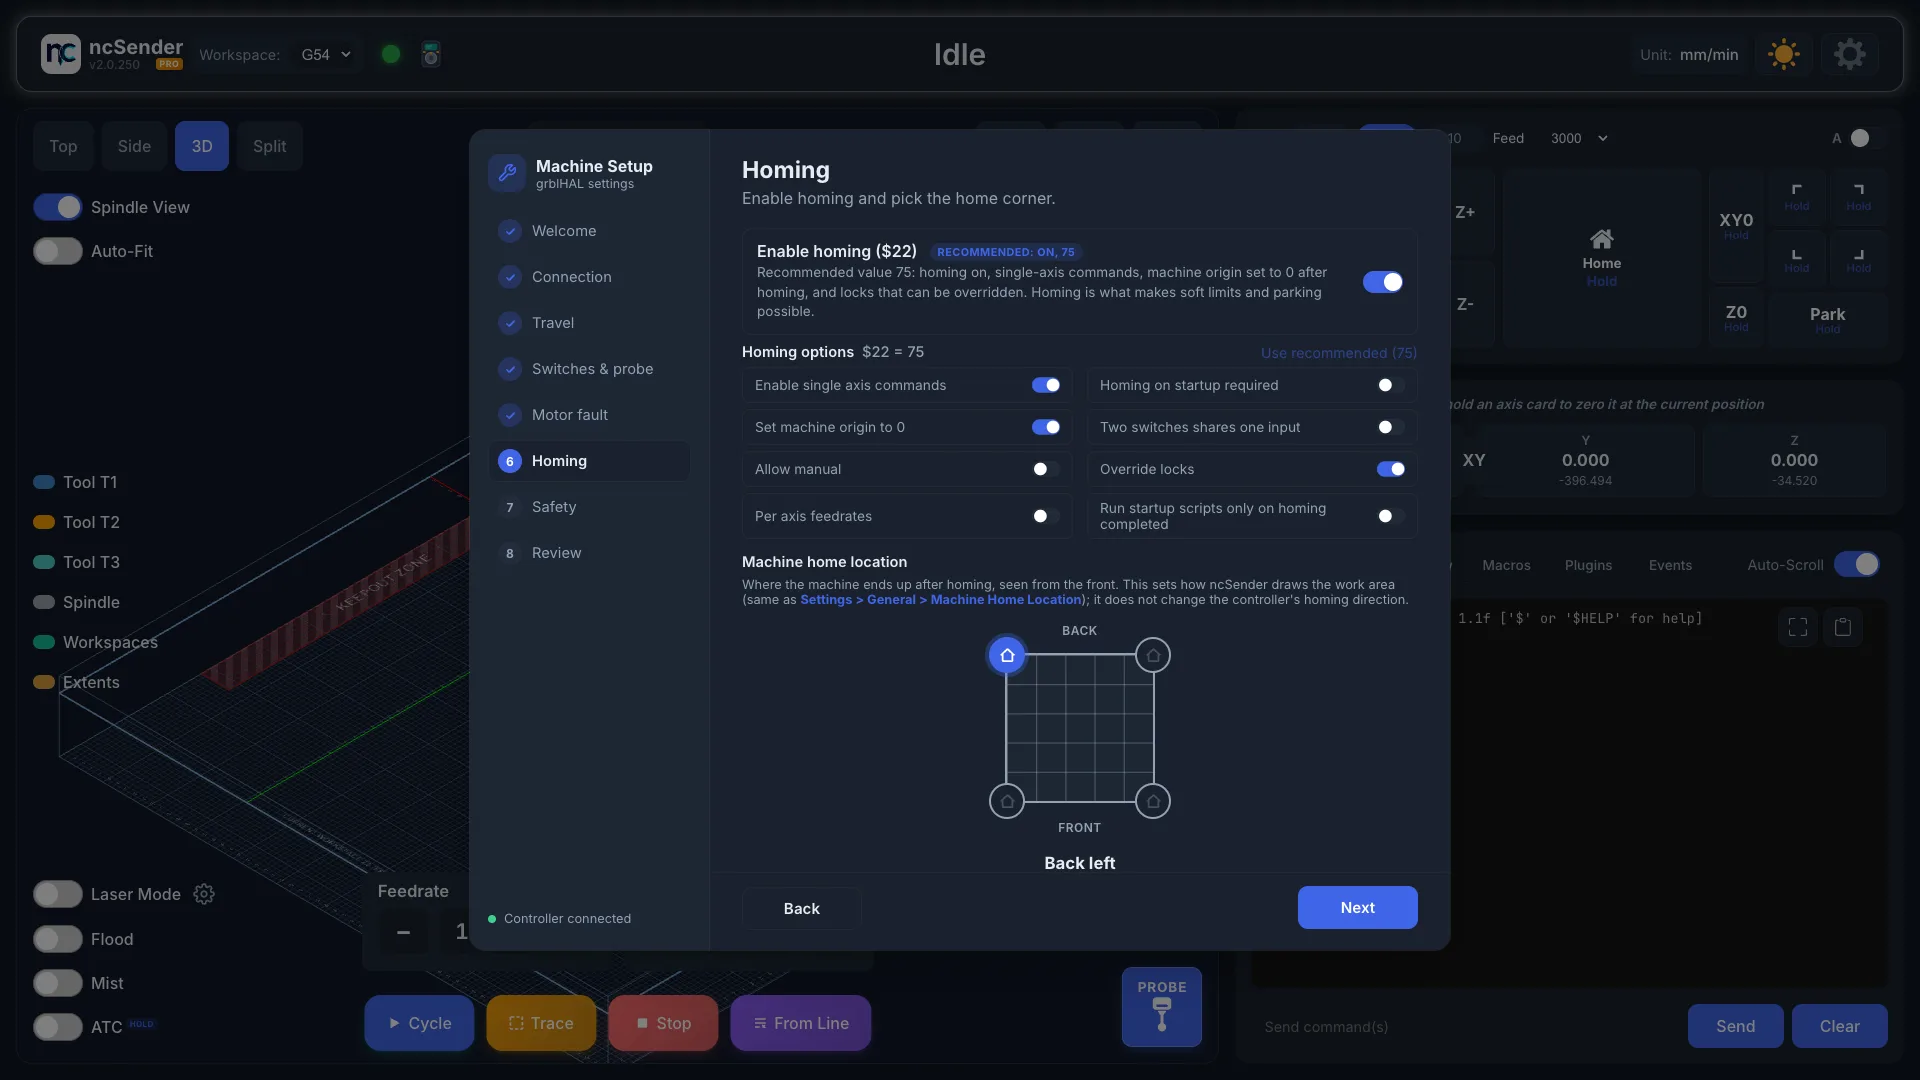
- Enable homing (
$22). The recommended value is 75: homing on, single-axis commands, machine origin set to 0 after homing, and locks that can be overridden. Click Use recommended (75) or set the individual options one by one. Turning homing off also turns soft limits off. - Machine home location. Pick the corner the machine ends up in after homing, seen from the front. This sets how ncSender draws the work area and is the same setting as Settings → General → Machine Home Location. It does not change the controller's homing direction.
- Pull-off after homing (
$27). How far each axis backs off its switch. 2 to 5 mm is typical.
Safety
| Setting | Recommended | What it does |
|---|---|---|
Soft limits ($20) |
On | Rejects any move that would leave the travel you entered. Needs homing, so it stays off while homing is disabled. |
Hard limits ($21) |
Off | Stops the machine immediately if a limit switch triggers during a job. Electrical noise can trip it mid-cut, so leave it off unless every switch is well shielded and reads correctly. |
Limit jog commands to travel ($40) |
On | Clamps jog moves to the machine travel instead of raising an alarm when a jog would overshoot. |
Review and apply
The review table lists every setting that differs from what the controller has now, with the current and new values side by side. Values already applied live on the switches and motor fault pages are not repeated.
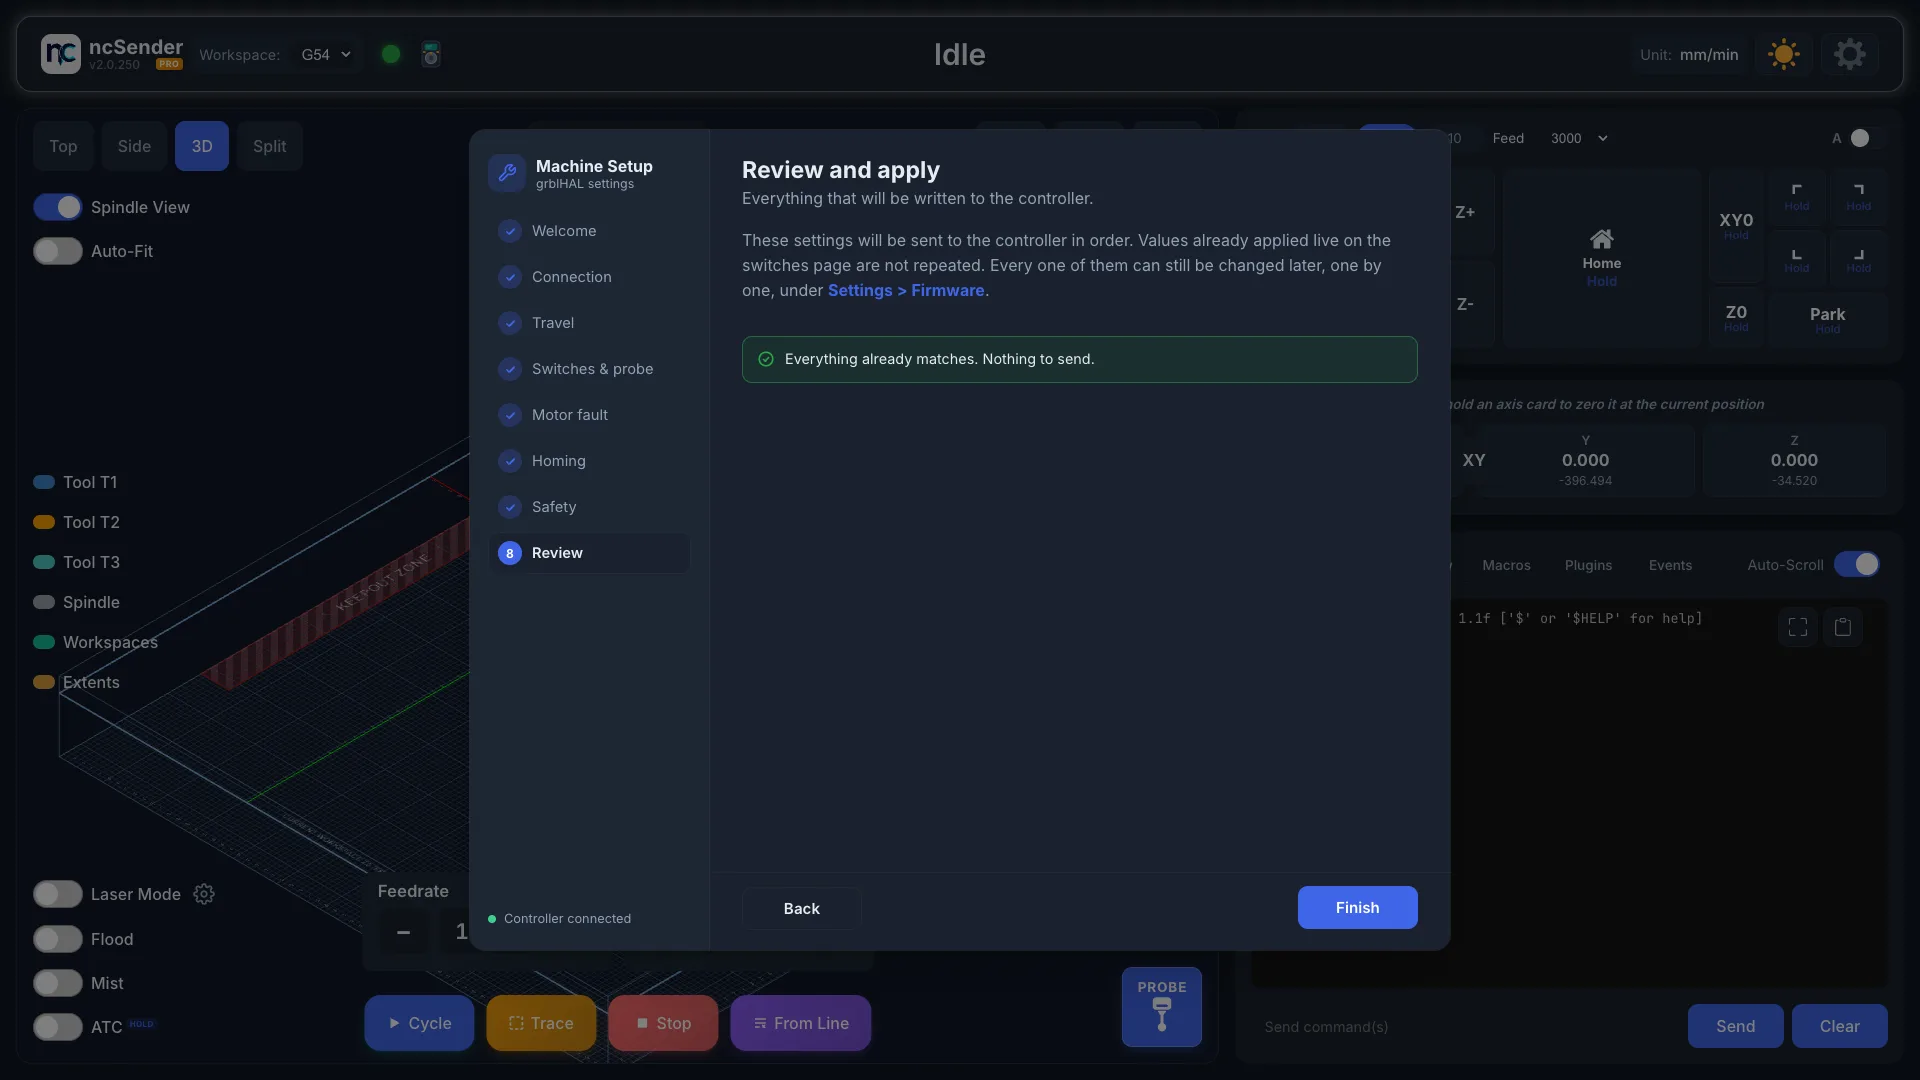
Click Apply. Settings are written one at a time in a safe order (homing before soft limits, since soft limits will not enable without homing). If a write fails, the wizard stops and tells you how many settings went through.
When everything already matches, the button reads Finish and nothing is sent.
Home before the first move
After applying, home the machine so the new travel and limits start from a known position. Every value can still be changed individually under Settings → Firmware.
After the Wizard
- Home the machine, then check a jog in each direction.
- Fine-tune the machine (Pro): steps/mm, max travel and squareness can be measured and corrected in Settings → Calibration. See Calibration.
- Motor fault alarm later on? If it appears right after you enabled the motor fault inputs, run the wizard again and turn on Invert for that axis.